
Gear up with the best insulation EQUIPMENT,
unbeatable SUPPORT, and
top-tier TRAINING right here!

Explore Our Equipment Where Innovation Meets Efficiency & Safety for Your Next Project.
InsulationMachines.net offers a wide range of insulation machines, blowers, and accessories for contractors and DIYers. Featuring durable, easy-to-use equipment from Cool Machines, designed by industry expert Dave Krendl, the site provides portable and high-production models for various insulation needs. They emphasize expert support, no-pressure sales, financing options, and on-site training, making it a trusted source for quality insulation equipment and tools.
Why Choose US to Purchase Your Insulation Equipment?

In the competitive insulation trade, your profitability is directly linked to your equipment uptime and material processing speed. Selecting cheap, unproven machinery leads to premature failures, clogged hoses, and frustrated installation crews. At Insulation Machines, we eliminate the guesswork. With over 30 years of hands-on field experience, we have vetted every machine type and proudly stand by the Cool Machines brand.
No Gimmicks, Just Guidance: We give you sensible, experience-based advice tailored to your exact workflow.
Manufacturer-Direct Machinery: Receive genuine Cool Machines products backed by the most robust warranties in the industry.
Field-Serviceable Design: Cool Machines are engineered with accessible, non-proprietary parts. This means you can execute routine maintenance and basic repairs right in the field using a standard toolbox, eliminating costly service freight.
Hassle-Free Financing: We offer fast, flexible lease-to-own programs to help you secure the ideal truck-mounted or portable equipment package without exhausting your cash flow.
We are experienced insulation contractors and trainers.
New Insulation Machines & Equipment by Dave Krendl of Cool Machines
High-Performance Insulation Blowers
We offer an array of insulation blowers engineered to process cellulose, fiberglass, and mineral wool (rockwool) at peak efficiency. From compact portable systems to high-volume dual-blower powerhouses, our lineup accommodates every production scale:
-
CM700: The ultimate choice for compact portability.
Perfect for tight residential retrofits, DIY applications, or contractors introducing dense-pack sidewall insulation as a secondary service. -
CM1500: Where portability meets serious production.
This highly versatile unit provides small-to-midsize contractors with the precise pressure control required for attic loose-fill and dense-packing without requiring a massive footprint. -
CM2400: The elite contractor’s favorite.
Available in standard and deluxe configurations, this machine balances industrial-grade production with simplified electrical setups. -
CM3500XL & CM4700 (The Green Machine): Designed for heavy-volume commercial and residential operations. These high-output systems can process thousands of pounds of material per hour, featuring mechanical chain-driven reliability and massive split-hopper capacities ideal for advanced wall spray setups.
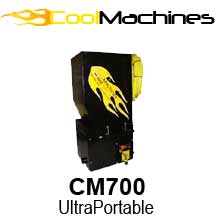
CM700: As Portable as It Gets!
Made with a contractor and Do-It-Yourselfer in mind! Available in two models – Standard and Deluxe
CM1500: Where Portability and Production Matter!
A portable machine with enough power to make the small contractor efficient!
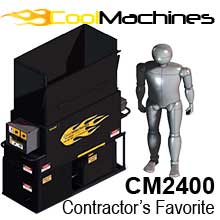
CM2400: The Contractor's Favorite!
With output that completes multiple jobs day in and day out!

CM-3500: Heavy-Duty Workhorse
For the commercial contractor who needs top production!

CM4500: The Last Machine You Will Ever Need!
Designed for wet/damp spray installation, this machine gives the ultimate in production and efficiency.
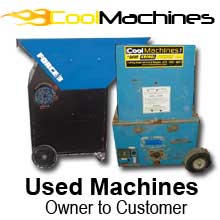
Used Equipment
Single Machines to Truck systems!
Rugged Insulation Removal Vacuums
Removing old, contaminated, or pest-infested attic insulation is a grueling, hazardous task. It requires an insulation vacuum that prioritizes crew safety and extreme material flow.
The CoolVac Series (CoolVac 23, CoolVac35 CoolVac 40) has revolutionized the restoration market. Built with thick, durable fan blades, Hardox-lined vacuum chambers, and forward-curved blade designs, these vacuums are explicitly engineered to eliminate terminal blockages from wood blocks, nails, and matted fiber.

Industry-Leading Equipment Training & Technical Support
We don’t just ship an insulation machine and walk away. Our core mission is supporting contractors beyond the initial sale.
Comprehensive On-Site Training
Understanding how to correctly run dense-pack fiberglass or balance a cellulose wall-spray system requires specialized knowledge. We host annual hands-on training seminars and provide custom, on-site onboarding for your crews.
24-Hour Technical Support Pipeline
If a machine goes down on a jobsite at 6:00 PM, you cannot afford to wait until the next day for a technical reply. Our support pipeline is open 24 hours a day. We can diagnose electrical faults, walk you through motor and seal replacement, or help you configure the machine to finish the job.
Frequently Asked Questions (FAQ)
What types of material can your insulation blowers process?
Cool Machines insulation blowers are all-fiber units.
What makes an insulation blower “field-serviceable”?
Traditional insulation vacuums use proprietary internal components that require specialized service centers. Cool Machines designs equipment with non-proprietary, easily accessible belts, bearings, and filters.
Do you provide hands-on training for wall spray or dense-pack installations?
Yes. We provide both virtual support and structured, on-site equipment training. Cool Machines hosts regular technical seminars focusing on wall spray and dense pack training.
What type of technical support do you offer after purchase?
We offer an industry-leading 24-hour-a-day technical support line. When you purchase through Insulation Machines, you gain direct access to our expert troubleshooting team at 877-909-USMADE. We help diagnose electrical setups, machine timing issues, and recommend preventative maintenance practices to protect your fleet investment.
Can I finance my new insulation blower or vacuum setup?
Absolutely. We partner with top-tier industrial lenders to offer ultra-fast, hassle-free financing and lease-to-own programs. This allows new or growing businesses to acquire top-tier truck setups or portable equipment while maintaining essential working capital.
NOW is the time to start an Insulation Business!
Local energy companies and the govern- ment are giving credits to those who improve insulation in their homes! NOW is the time to begin an insulation business! Ask us how! We will give you sensible advice and help! We are ready to get you started right!
Call Barry
at 877-909-USMADE or 810-614-0072
Email: barry@insulationmachines.net
We are available

before AND after the sale!

 Barry Pendley
Master Distributor for Cool Machines
These machines have revolutionized the insulation machine market! With over 30 years of experience using various machines, we find that the Cool Machine brand of insulation blowers is the best choice. Why?
Price point: A contractor can enter the insulation trade with a machine that can easily pay itself back in two-three jobs.
Strong engineering: Dave Krendl brings many years of engineering experience, specifically in the insulation machine industry. His innovative machines capitalize on the strengths and efficiency demanded by insulation installers.
Innovative Insulation Machines: When Cool Machines entered the market, they brought with them decades of engineering experience, specifically related to the insulation machine market. Here is a quick look at their innovations:
- Cool introduced scalping augers to eliminate troublesome bridging issues.
- Cool introduced the vac saver to prevent foreign objects from damaging the vacuums.
- Cool raised the “bar” by powder-coating all metal items and using a heavier gauge of steel without raising weight.
- Cool developed an insulation blower that was recognized by the industry and others mimicked the styling.
- Cool improved on the vacuums by making thicker, more durable fans, haldox-lined vacuum chambers and forward curved tips to prevent vacuum blockages.
- Cool realized that it is difficult and expensive to send your machine back for service. So, they made a machine that is based on non-proprietary parts which can be replaced with a minimal tool box and serviced even out in “the field.”
- Cool separated the gearbox from the motor for low cost replacement of individual modules.